
This post explains how to manually force and update the global address list in Office 365.
Updating the global address list requires to have the Address List Management role. By default, nobody has this role.
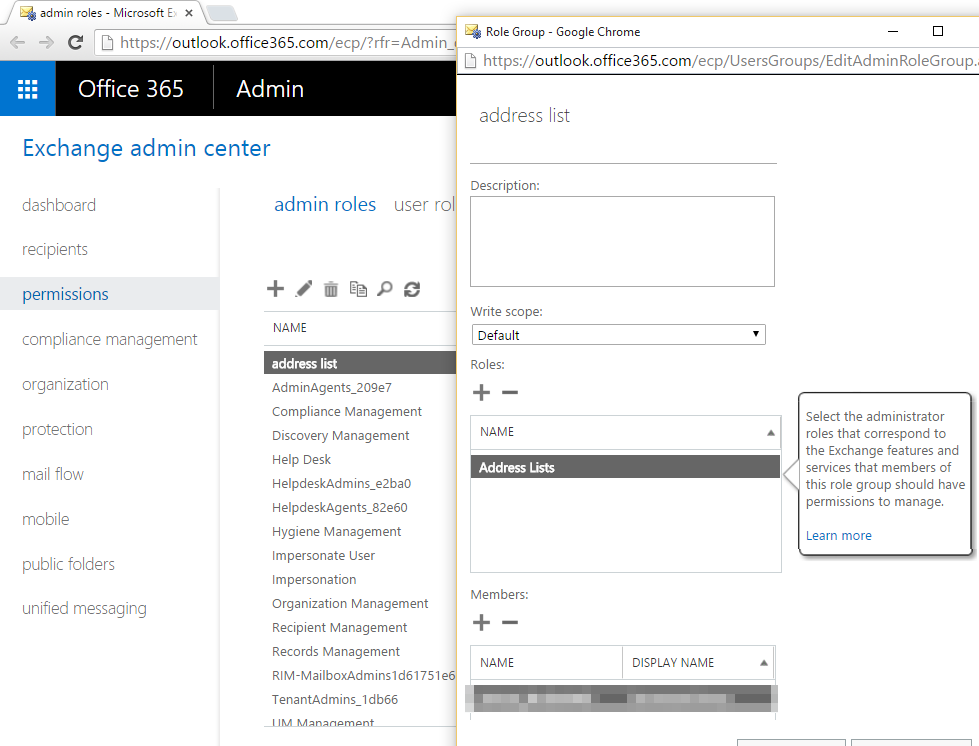
1. Assign the AddressList Management role
- Login with your administrator account to the Office 365 portal.
- Go to Exchange Admin center, Permissions and admin roles.
- Create a new role group and assign the AddressList role.
2. Update the AddressList
Once you have the AddressList role assigned, you can use the powershell commands to update the address list. You will have to wait for sometime until the new cmdlets are available.
- First thing, logon to Exchange online using PowerShell.
-
$UserCredential = Get-Credential
$Session = New-PSSession -ConfigurationName Microsoft.Exchange -ConnectionUri https://outlook.office365.com/powershell-liveid/ -Credential $UserCredential -Authentication Basic -AllowRedirection
Import-PSSession $Session
- Run the command Get-AddressList and verify that it’s working. (This may take some to work after creating the role)
- RunSet-AddressList -Identity “All usersâ€
- Your address book is now updated
Author
Related Posts

Provisioning a New Office 365 User and Mailbox from Exchange Hybrid via PowerShell
Working with many Office365 clients, I receive queries on how to go about provisioning users and mailboxes for an Exchange hybrid deployment....

Add Alternate Email Address or Recovery Email Address for Office365 Administrator
In Office365, depending on the admin role of an account you may want to add an alternate email address for password recovery....
Read out all
Outlook 2016: Remove Duplicate entries in Room Finder
In Outlook 2016 some users may noticed dual entries in the Room List: The room list behavior that we see  in Outlook is by design. When we ...

Office365: List Your Business Can’t Live Without
When you have a lot of conference rooms, equipment or special rooms mailboxes it is hard to list or find available free...

Hack: Microsoft Outlook AutoComplete
Outlook maintains the AutoComplete list. The list is used by both the automatic name-checking feature and the automatic completion feature. The AutoComplete...
Read out all
Cleaning up Office365 Groups Mess
Office 365 Groups are a shared workspace for email, conversations, files, and events where group members can collectively get stuff done. It...